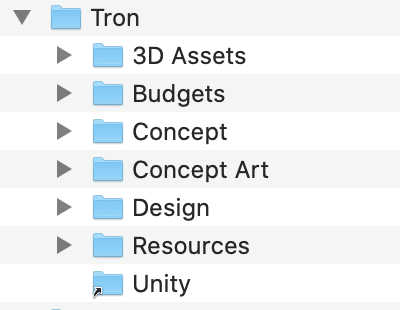
Here’s a little idea if you’ve ever been bothered by the inability to change your project name in Unity Hub. Let’s say your project uses a directory structure that looks like the following:
├── Awesome Game
│   ├── 3D Assets
│   ├── Budgets
│   ├── Concept Art
│   ├── Design
│   ├── Resources
│   └── Unity
Now if you’ve got 10 games using a similar structure, then you’ll likely see 10 projects with the name “Unity” in Unity Hub. That’s a bummer to pick through.
CREATE A “UNITY PROJECTS” DIRECTORY
Well, we can solve this with a simple symlink. The first thing you’ll want to do is change where you’re saving all your Unity projects. You’re now going to store them all together. Find a place on your machine and get to this point:
└── Unity Projects
    ├── Space Invaders
    ├── The Black Cauldron
    ├── The Last of Us
    └── Tron
They’re all going to live together in one spot, which is actually somewhat convenient if you’re just looking for a particular game directory.
These projects can be added to the Unity Hub now and they will correctly display their descriptive names. Cool! We’re done with the first step.
CREATE A SYMLINK
Now we turn our focus to our all-encompassing project folder. You know, the one that has all the stuff in it and not just the Unity project. I’m on a Mac so this next step may differ for you, but the principal should be the same.
USING THE FINDER
You can create a symlink or “Alias” by right-clicking on your project in the Unity Projects directory and choosing Make Alias.

You can then name that alias anything you like. I chose to call it “Unity”. Move that symlinked directory back to your all-encompassing project folder. Voilà! You’ve got the correct name in Unity Hub and a custom name in the directory on your computer.

USING TERMINAL
If you prefer using the Terminal to create symlinks the syntax is:
ln -s /path/to/file /path/to/symlink
I’m assuming you can figure it out from there if you’re a regular Terminal user.
THANKS
Thanks to @JesterBrazen for the suggestion on this one. It gets the job done!
